BlenderPy
BlenderPy is a high level python API wrapped around the Blender python API, but which can be used from a python interpreter thanks to a server running on a Blender add-on. The link to the pdocs generated API doc is here
Installation
The installation is done in two parts:
- The python installation
You should download the repository by typing git clone https://github.com/ThibaultCapelle/BlenderPy.git
in the parent repository where you want it to be installed.
This last command requires to have git installed, if not you can have it here.
After that, you navigate to the repository in a shell and use the command pip install -r requirements.txt
- The Blender addon installation
Open Blender, and go to Edit/Preferences/Add-ons/Install, and then navigate to the repository, and select Blender_addon.zip.
Then find the installed add-on, called “Python Server” by searching “Python” with “Community” activated. Then, tick the box to activate it.
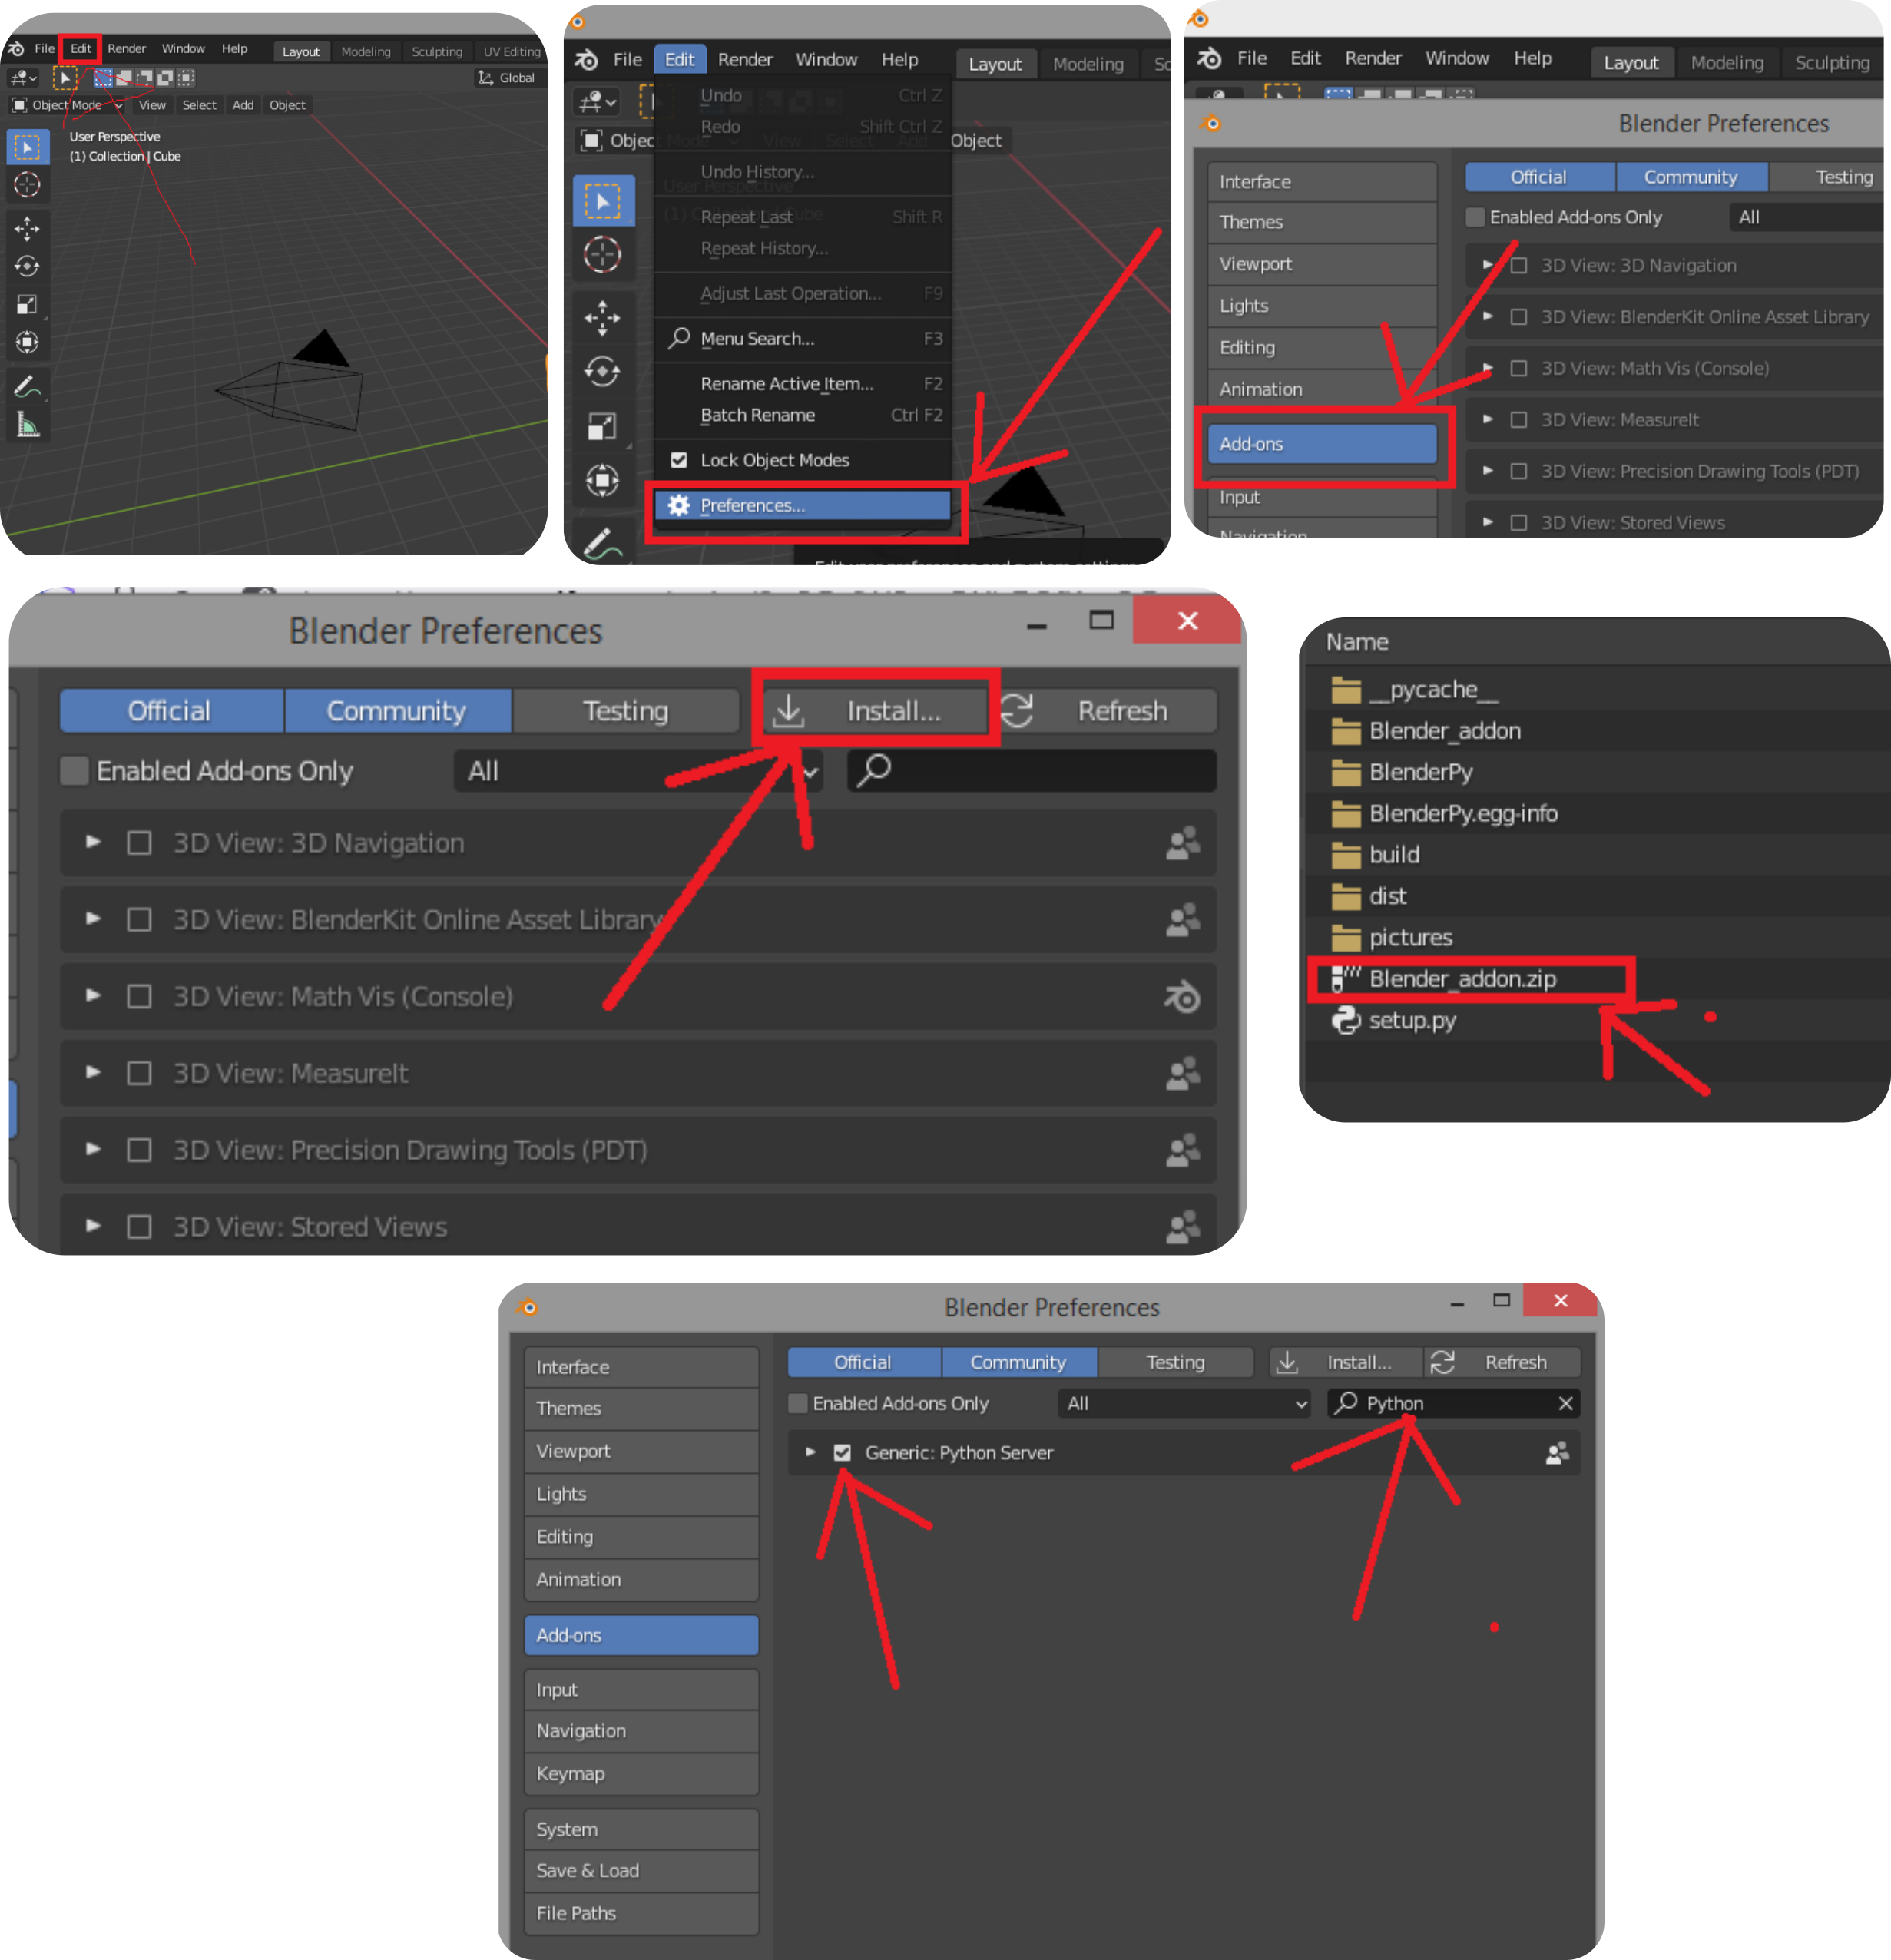 Now the add-on is up and running, and you won’t need to reactivate it every time you launch Blender. You can see some debugging text in the Blender
console, that you can see by clicking on “Window/Toggle System Console”.
Now the add-on is up and running, and you won’t need to reactivate it every time you launch Blender. You can see some debugging text in the Blender
console, that you can see by clicking on “Window/Toggle System Console”.
Basic use
To use it, you will need to have Blender open, and to execute some Python commands from a Python interpreter. The high level classes and methods are in three submodules:
BlenderPy.sending_data
This submodule contains the delete_all() method, and the Material, Scene, Camera, Light, Curve classes, as well as all the object methods, constraints, etc.
BlenderPy.meshing
This submodule contains all the meshing tools, basic shapes you want to use: Box, Sphere, Plane, Cylinder, Arrow, Path, Rectangle, RoundCorner, AngularSector, Circle
BlenderPy.external_loading
This submodule contains the classes used to load external files. The three format currently supported are:
- VTU files: those are for example the results of a Comsol simulation
- STL files: those are for example a Comsol geometry, or an Inventor/SolidWorks/Catia export
- GDS files
Examples
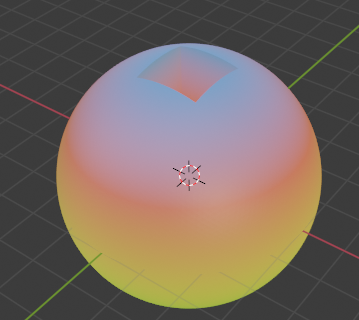
Playing around with a ball, a cube and materials
from BlenderPy.sending_data import delete_all, Material
from BlenderPy.meshing import Box, Sphere

delete_all()
s=Sphere(radius=3, refine=5)
b=Box(Lx=1.5, Ly=1.5, Lz=1.5)
b.zmax=s.zmax
s.subtract(b)
b.remove()
glow_material=Material()
glow_material.glowing(color='#1BE636', strength=0.1)
glow_material.z_dependant_color(positions=[0.,0.75,1.],
                               colors=['#5DF604',
                                       '#DF1111',
                                       '#273B9E'])
s.assign_material(glow_material)
Making a simple plane oscillating

To see the animated result, you can click here
from BlenderPy.sending_data import (delete_all, PositionDependantMaterial,
                                    Scene, Camera, Light)
from BlenderPy.meshing import Box
import numpy as np

delete_all()
b=Box(Lz=0.1)
b.divide(Nx=20, Ny=20)
verts=b.vertices
verts[:,2]=0.25*np.sin(2*np.pi*verts[:,0])*np.sin(2*np.pi*verts[:,1])
b.vertices=verts
material=PositionDependantMaterial('z+0.125',
                            positions=[0.,0.125,0.25],
                            colors=['#5DF604',
                                       '#DF1111',
                                       '#273B9E'],
                            coordinate='Object')
b.assign_material(material)
camera=Camera(location=[0,-2.5,2.5],
              rotation=[np.pi/4,0,0])
light=Light(location=[2,2,2], power=1000)
scene=Scene(frame_end=200)
b.insert_mesh_keyframe(frame=1, waiting_time_between_points=0.025)
b.insert_mesh_keyframe(frame=200, waiting_time_between_points=0.025)
verts[:,2]*=-1
b.vertices=verts
b.insert_mesh_keyframe(frame=100, waiting_time_between_points=0.025)
b.smooth()
b.use_auto_smooth=True
b.auto_smooth_angle=np.pi/180*80
Extract the characteristics of one object in a Json file to reuse it in a script
Sometimes, the GUI is more convenient to test positions, rotations and object properties quite finely, but we want to include a hand-chosen property in a script without going through the trouble of manually copy paste it. To do so, the BlenderPy addon activates a new hotkey: while having selected the desired object you want to get the properties selected, press Alt+S, which opens a file selection popup. Choose a place and enter a .json filename, then press ‘Saving’. After that you can include those properties in your script as follows:
from BlenderPy.sending_data import Camera
cam=Camera(filepath=my_filepath)
Load an external GDS/STL/VTU files
- The syntax is:
from BlenderPy.external_loading import GDSLoader
loader=GDSLoader(filename=path_to_GDS_file,
               layer=layer_to_consider,
               xmin=xmin_of_the_bbox_to_select,
               xmax=xmax_of_the_bbox_to_select,
               ymin=ymin_of_the_bbox_to_select,
               ymax=ymax_of_the_bbox_to_select,
               cell_name=name_of_the_cell_to_consider,
               thickness=Desired_thickness_of_the_extruded_shape,
               **kwargs)
mesh=loader.load()
for a GDS file.
cell_namedefault to ‘TOP’, and thethicknessdefault to None which means that no extrusion is needed. A lot of parameters can be added viakwargs, for examplelocation=[0,5,0]will place the mesh at this position after the load,rotation=[0,3.14/2,0]will rotate the mesh,scale=[2,2,2]will scale uniformly the mesh by a factor 2,material=my_materialwill add the corresponding material, orfilepath=filepathcan be used to load all the properties from a json file. - The syntax is:
from BlenderPy.external_loading import VTULoader
loader=VTULoader(filename, **kwargs)
mesh=loader.load()
for a VTU file, where
kwargscan use the same parameters as above. - The syntax is:
from BlenderPy.external_loading import STLLoader
loader=STLLoader(filename, **kwargs)
mesh=loader.load()
for a STL file, where
kwargscan use the same parameters as above.
Create a complicated mathematical formula for an Emission Material
- First example:

from BlenderPy.sending_data import (delete_all, EmissionMaterial)
from BlenderPy.meshing import Cylinder

delete_all()
glow=EmissionMaterial(expression='20*cos(|x-0.5|*3.14/0.1)*sin(|y-0.5|*3.14/0.1)*(((x-0.5)^2+(y-0.5)^2)<0.1)')
cyl=Cylinder(name='cyl', radius=1, height=5, material=glow)
- Other example:

from BlenderPy.sending_data import (delete_all, EmissionMaterial)
from BlenderPy.meshing import Cylinder

delete_all()
glow=EmissionMaterial(expression='10*(((x-0.5)^2+(y-0.5)^2)<(0.08*(z^2)))')
cyl=Cylinder(name='cyl', radius=1, height=5, material=glow)
- Probably more useful: a gaussian laser beam

from BlenderPy.sending_data import (delete_all, GaussianLaserMaterial)
from BlenderPy.meshing import Cylinder

delete_all()
glow=GaussianLaserMaterial(alpha=0.001, waist=0.1, strength=30)
cyl=Cylinder(name='cyl', radius=1, height=5, material=glow)
Make a Camera turn around a cube

To see the animated result, you can click here
from BlenderPy.meshing import Box
from BlenderPy.sending_data import (delete_all, Material, Light, Scene,
                                    Curve, Camera)
import numpy as np

delete_all()
scene=Scene(frame_end=200)

material=Material(color='#16BDC3')
material.surface_noise(scale=1., detail=14.5,
                       dimension='3D', roughness=0.308, origin='Object')

b=Box(material=material)
cam=Camera(location=[2,2,2], rotation=[20.8*np.pi/180,
                                       43.7*np.pi/180,
                                       4.8*np.pi/180])
light=Light(location=[3,3,3], power=100)
R=np.sqrt(cam.x**2+cam.y**2)
theta_0=np.arctan2(cam.y, cam.x)
thetas=np.linspace(0,2*np.pi, 100)+theta_0
curve=Curve([[R*np.cos(theta), R*np.sin(theta),
              0] for theta in thetas])
following=cam.follow_path(target=curve)
following.properties['offset']=0
following.insert_keyframe('offset', frame=1)
following.properties['offset']=-43
following.insert_keyframe('offset', frame=200)